This is the third resource in our manure management series! Check out our Intro and Advanced resources on the subject matter here!
At this point, you have probably reviewed the needs of your sanctuary and decided on a plan to compost bedding and manure at your sanctuary. If you have never composted before, this may seem a daunting task! Even if you have experience composting on a household level, managing a successful compost system for a sanctuary requires considerably more work.
This resource will explain the composting process and the tools and techniques required to successfully compost waste at your sanctuary. Composting can be a great option for sanctuaries because if done properly, it can reduce parasite and fly populations, limit offensive odors, and be spread onto pasture lands. This information contained in this article has been adapted from Manure Management For Small And Hobby Farms from the Northwest Recycling Council.
What Exactly Is Composting?
You may hear a lot about composting old kitchen scraps and lawn cuttings, but it is more than throwing these waste materials in a pile and letting the magic happen. Composting is a very controlled and managed aerobic decomposition process. If done properly, It produces a stable, nutrient-rich material that can be utilized on fields and in gardens. Just stockpiling manure and bedding waste is NOT composting. This waste will decompose quite slowly, and will have a relatively small effect on the overall volume.
Successful composting requires the proper mixture of materials, oxygen, moisture, area design, and maintenance to provide the right environment for microbial activity. These little microbes or beneficial bacteria and other organisms will then digest and process manure and bedding. With proper maintenance, temperatures in the compost pile should rise high enough to kill off pathogens and parasites. The volume of manure and bedding will reduce by around 60%, and odor will be limited as nutrients become concentrated!
The great thing is that composting can be a viable option for sanctuaries of all sizes, and thus can be designed to meet the specific needs of your sanctuary. However, in order for it to be successful, it requires a lot of upfront planning and good management. So what does it take to make a great composting system?
Elements Of Composting

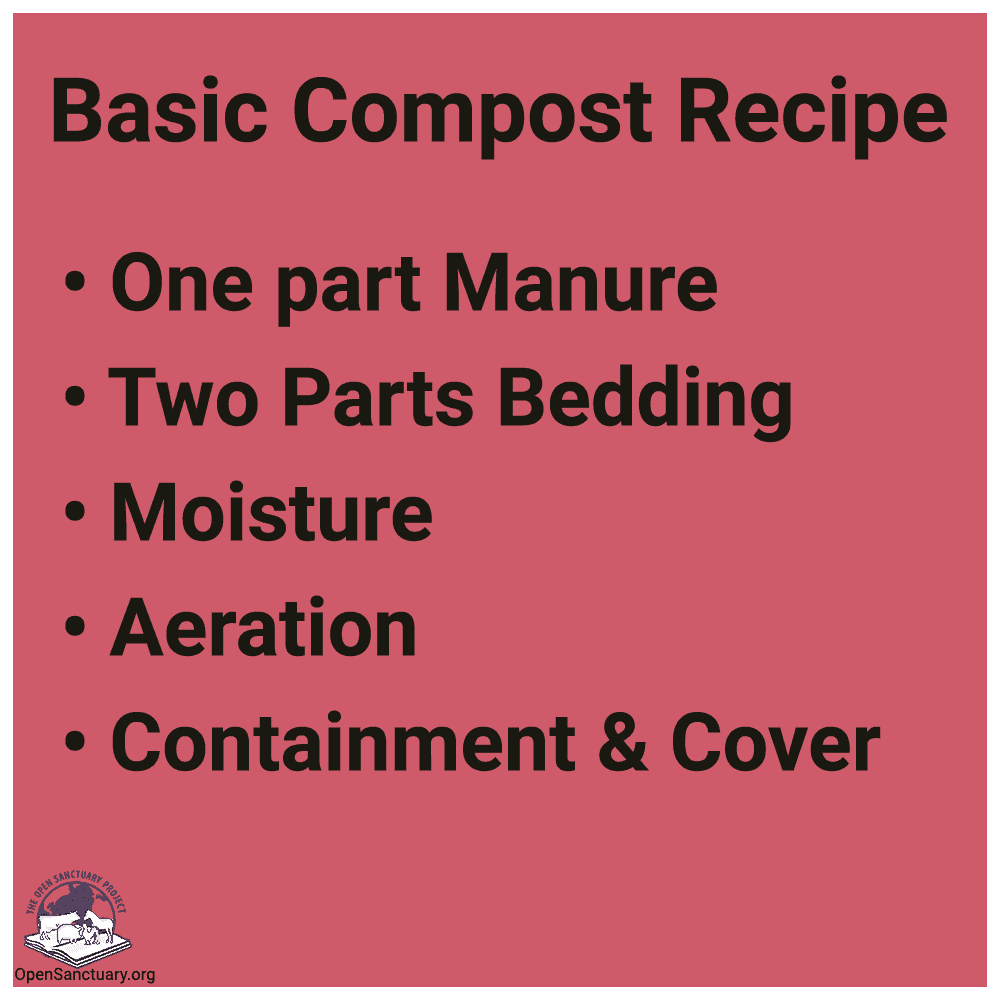
- Aeration: Yes, that’s right, AIR is a vital part of the composting process; the microorganisms in your compost need to breathe! In order to ensure the compost gets the oxygen it needs, you must turn it regularly and/or add pipes through the pile, windrow, or bins.
- Nutrient Balance And Porosity: Successful composting requires a pile that contains roughly 20 to 40 parts of carbon to each one part of nitrogen. Don’t worry! It isn’t as scary as it sounds. You get your nitrogen from manure and carbon from straw, shavings, and wood pellets.
-
- Horse manure is high in nitrogen as bedding and flooring is often collected with it. If your compost pile is high in horse and donkey manure, it may need additional nitrogen like cow manure or grass clippings.
- Reversely, if you have mostly cows as residents at your sanctuary, you may need to add more carbon sources.
-
- Goat, sheep, chicken, llama, pig, and rabbit residents should have an adequate mixture of carbon and nitrogen with typical bedding and manure generation, depending on the amount of bedding being used. A certain amount of wasted hay may need to be factored in as a carbon component as well.
-
- Manure on its own has a relatively low C:N ratio, depending on the manure. Manure with larger portions of bedding can have C:N ratio of 50:1. As long as there is adequate moisture and aeration in the pile, this high carbon ratio should compost effectively. If desired, or if the pile does not heat up sufficiently, nitrogen sources, such as grass clippings, or chicken manure, can be added.
- Manure on its own has a relatively low C:N ratio, depending on the manure. Manure with larger portions of bedding can have C:N ratio of 50:1. As long as there is adequate moisture and aeration in the pile, this high carbon ratio should compost effectively. If desired, or if the pile does not heat up sufficiently, nitrogen sources, such as grass clippings, or chicken manure, can be added.
In addition to having the right C:N balance, the porosity of materials is important.
- Materials in your compost pile cannot compost properly if they are too compacted or contain too much moisture as that air cannot flow through.
- If you mix equal portions of bedding and manure, porosity should be adequate.
- Routinely mixing up materials can help to achieve additional porosity.
Moisture: The moisture content of your compost pile should be 40 to 65 percent and uniformly moist in order to achieve the desired balance.
- If you squeeze a handful of compost, you should be able to get a few drops from it.
- If it is too dry, you may need to add more water in the beginning of the process and possibly periodically throughout.
- A drip irrigation tubing or sprinkler system can be a successful way to add water.
- Piles can also be exposed during the rain, but be sure to manage runoff!
- On its own, manure is usually too wet for composting. Soiled bedding helps.
- Keep some bedding and/or wasted hay and add it to the compost pile as needed when fresh manure, particularly wet manure is gathered.
Temperature: If maintained properly, the microbial action involved in decomposition in a compost pile will generate heat. Temperatures between 120° and 160° Fahrenheit should be reached within two days.
- In order to kill pathogens, weed seeds, and parasites, the temperature needs to reach and stay at or above 131 ° Fahrenheit for 15 days.
Types of Composting
Bin Or Shed System
- A three-bin system should be adequate for up to five large animal residents. Additional bins can be added, depending on the needs of your sanctuary.
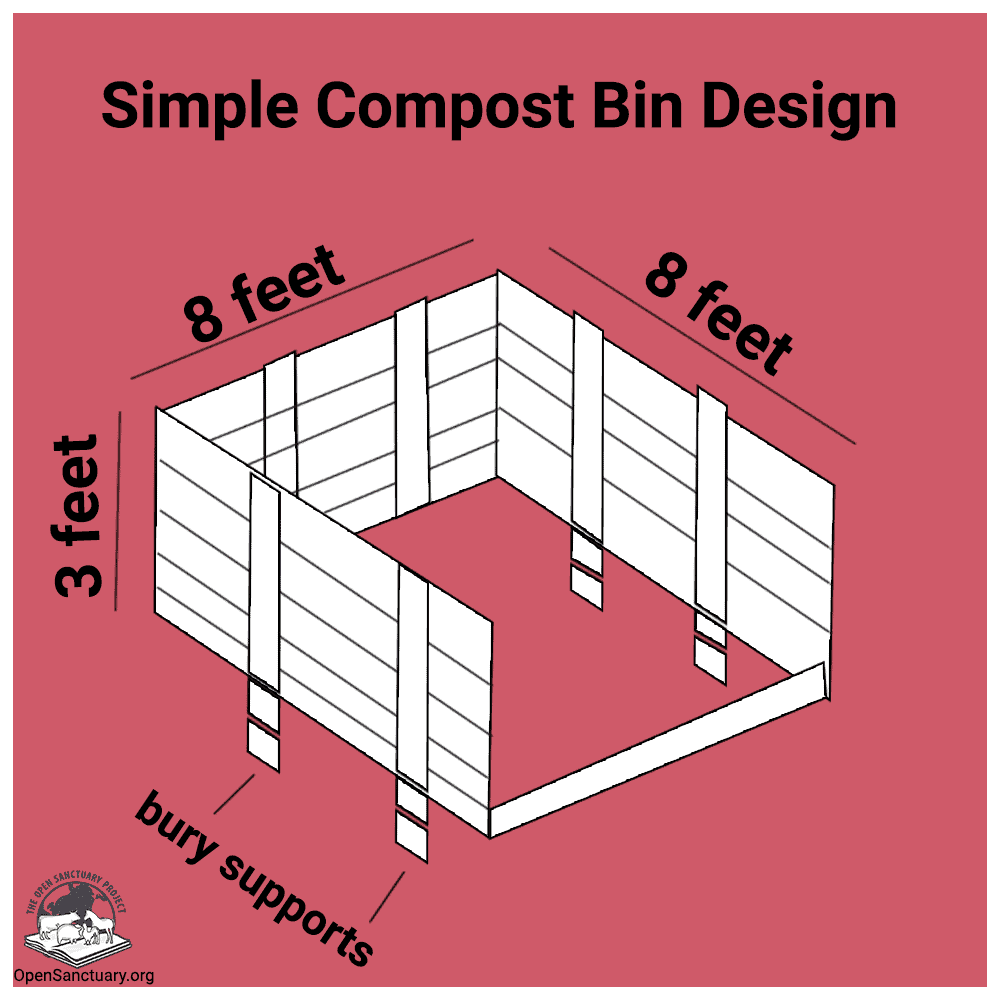
- You can construct bins from concrete blocks, wood, or pallets.
- You can also use a grain bin or bulk storage building as a composting bin.
- Wood pallets make free and easy to construct bins.
- Nine pallets can make a three-bin set. Nail the pallets together use steel rods or rebar to affix the pallets to the ground for stability.
- Landscape timbers can also be used to construct bins. Be sure to use wood that is rot resistant, but not pressure treated with arsenic.
- A shed composter consists of three or more three-sided bins with a roof.
- Before you construct a shed composter, take into account how you will be turning the composting materials. How wide and tall does it need to be to allow tools for turning and dumping?
- Bins should be between 3-5 feet high and have enough capacity to hold about 4 cubic yards of material or, in other words, about 16 wheelbarrows’ worth of material.
- Widths can range from 5 t o 8 feet. Consider the equipment to be used in loading or turning material when sizing the bins.
- If you use a wheelbarrow to dump materials and plan on turning the pile by hand, size the bins smaller so that turning material into the next bin is easier. If a tractor is used, size the bin according to the size of the bucket.
How To Compost In A Bin as recommended in Manure Management For Small And Hobby Farms | Northwest Recycling Council:
- Pile manure and bedding wastes into the first bin until it is full.
- Water the materials as they are added, if necessary.
- Materials should not be piled higher than 6 feet.
- When the first bin is full, begin filling the second bin.
- Use the third bin to turn the compost from the first bin into for aeration.
- Add additional bins if necessary.
- Cover the bins with a tarp, durable plastic sheet, or roof to prevent too much moisture from entering the pile.
- Covering also prevents rainwater from washing nutrients out of the compost.
- To increase aeration and reduce the need for turning the pile, place a few 5-foot PVC pipes {4- to 6-inch diameter) into the bin as you put in materials so that the pipes reach the center of the pile. These should stick out of the pile several inches. Drill small holes into the pipes before inserting them. The holes should be about a half-inch in diameter at 4- to 6-inch intervals.
- Additional water can be added through the PVC pipes to ensure water is getting into the center of the piles. Monitor the temperature of the materials in the bins once full. Adjust or turn the materials as necessary in order to achieve optimum temperatures for composting. Once temperatures start to decline, turn the pile into the empty bin to continue composting.
- Materials should be turned once per week for the first 3 months of composting.
- If pipes are used for aeration, turning can be less frequent.
- When turning the pile make sure that material is turned into the inner part of the pile in order to ensure even heating of all materials in the pile.
- After about 3 months, the contents from previously filled bins can be turned into one bin.
- Turning frequency of this material can be reduced to once per month until the compost is ready for curing.
Compost Pile
As recommended in Manure Management For Small And Hobby Farms | Northwest Recycling Council:
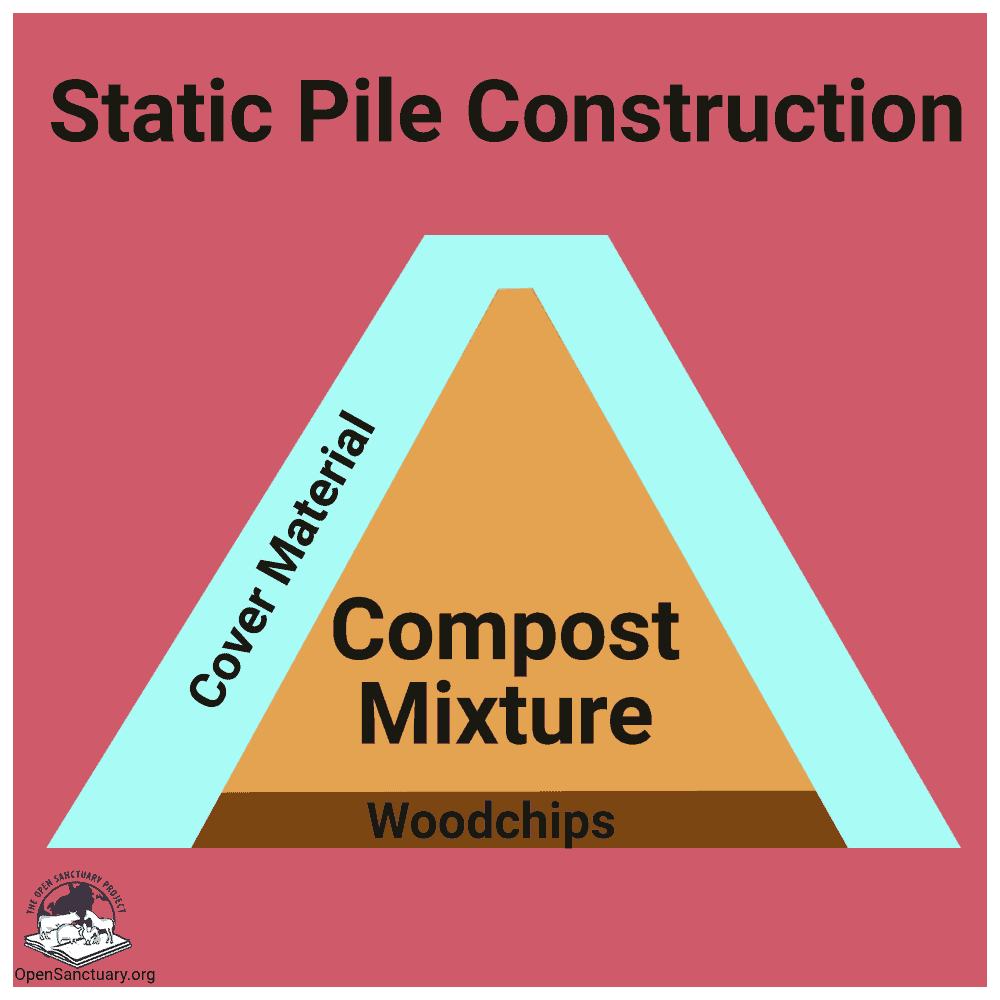
- You can passively manage a compost pile (static pile). This is where the piles are turned infrequently, and aerated by running a pipe or pipes through the pile, as described in the bin method, above.
- As an alternative, piles can be turned about once per week using a pitch fork or bucket loader. Layer materials in the same way as described under the bin method. Form a haystack-type pile by adding waste until the pile reaches 4-6 feet high.
- Piles should be no more than 6 feet high and 12 feet wide in order to ensure sufficient air movement through the pile.
- Cover the first pile and begin building a new pile; repeat as necessary.
- Sufficient space should be available for 2-3 additional piles, depending on manure volume.
- Piles should remain covered.
- The compost pile method takes several months to one year or more depending on the air flow though the pile or the frequency of turning.
Windrow Piles
Sanctuaries with more than a few large residents may find it more practical to use the windrow composting method. A windrow is a long, narrow pile, which is turned on a regular basis.
- A windrow should be 10-15 feet wide by 3-5 feet high.
- They can be built using a manure spreader, dump wagon, dump truck, bucket loader, or wheelbarrow and pitchfork.
- Use a wide board as a ramp to build the piles to sufficient height and mass, if using a wheelbarrow.
- Keep piles as straight and uniform as possible.
- If building more than one windrow, be sure to leave enough space between them for drainage and to allow for turning.
- Windrow composting of manure typically takes about eight weeks to nine months, depending on how often the pile is turned.
- The windrow will require turning about eight times over an 8-week processing period..
- The size of the pile must be sufficient to achieve desired temperatures, but not too large to be managed by available equipment.
Location For Compost Pile
- Ideally your composting pile will be near or share your manure storage area.
- Be sure to respect the same protocols of placement you would for your manure storage area, including set back from water sources, using vegetated filter strips/buffers, and so on.
- If space is an issue and requires you to have a composting area separate from the manure storage area, be sure to build the manure storage to hold sufficient wastes until the material can be moved to the compost area.
- Additionally, a separate manure storage area may still be useful to supplement the composting operation and allow flexibility of when materials are added and as a backup if the composting operation is interrupted.
- A storage facility used in the winter can serve as a pad for summer composting or as a mixing pad for composting.
- Locate the compost area on a level or gently sloped surface (2-4%).
- Windrows should be parallel to the slope. Access to a garden hose or other watering source is necessary.
- A sketch of the compost area would be beneficial to determine prevailing wind direction, traffic flow patterns, land slope, runoff patterns, surrounding land uses, and the location of wetlands or water bodies. An agricultural extension office can provide assistance with site planning, soil information, and drainage control.
General Composting Guidelines
Depending on your state or local jurisdiction, composting operations may require special permitting. This usually only applies if materials for the compost pile are brought from outside of the sanctuary. To find out more, check with your local environmental agency and local health department.
- Lay down a 6- t o 8-inch layer of wood chips under your bins, pile, or windrow to enable airflow through the bottom of the pile.
- In order to begin the compost process, materials need to be stacked at least 3-5 feet high.
- The compost temperature should be taken every 5-10 days, moisture levels accessed, and general appearance gauged. This is particularly important for novice composters.
- After the pile has been turned once or twice, less frequent monitoring is required.
- Once the temperature goes below 120° Fahrenheit, it should be turned.
- Typically, a compost pile with proper ingredients and moisture level require turning once a week during the first month or two of the process, then once or twice a month after that.
- If pile temperatures are not raised sufficiently, it may need to be turned more often.
- Depending on the materials and compost management, the active composting phase will last six to ten weeks .
- Compost should also be turned if it reaches temperatures above 140° Fahrenheit.
- Bedding and manure from barns or stalls is usually mixed sufficiently to add to the compost pile.
- Manure added from pasture or paddock clean-up should be layered with bedding material
- for each 6-24 inches of manure, add a 6-inch bedding layer (or other carbon source, such as straw or old hay).
- Sawdust can compact relatively easily, so the pile may require the addition of straw or other material to allow sufficient airflow through the pile.
- Piles or bins should remain covered, especially in the winter, to retain temperature and moisture levels. They can be uncovered in the rain to add moisture, if necessary.
- Larger windrows do not need to be covered.
- Carbon materials will decompose at different rates.
- Straw will decompose faster than wood materials.
- Wood chips may never entirely decompose.
- As the compost process continues, piles will diminish in size.
- Contents from separate bins, piles, or windrows can be mixed together to conserve space and ensure that there is a sufficient volume of material to continue the composting process.
- When the pile is turned, especially with fresh materials in it, it will give off a strong odor.
- Try to turn it when there is no wind and on cooler days.
- Consider turning it on a weekday when neighbors are less likely to be home.
- If unpleasant odors persist, there is likely something wrong with the pile.
- Odors can be contained by covering the composting materials with a layer of peat moss and/or woodchips (about a 4-inch layer of each).
- Cover this with a tarp that is several inches above the pile; string the tarp from poles or other firm structure.
- Shape piles with a flat or concave top to absorb as much rainfall, snow melt, or watering as possible.
- The composting process may be slower in colder weather.
- Covering the pile ensures that leaching will not occur; using black plastic will help the pile heat up faster on warmer days.
- Once the weather warms up sufficiently, the pile should be turned.
- If rapid composting is desired, it is important to stay within the preferred range of conditions for all factors impacting the composting process.
Supplies/Equipment
- Non-mercury compost thermometer at least 2-3ft long.
- These can be found in hardware and garden stores and on the internet.
- Microsanctuaries with just a few residents can easily compost using a pitchfork and shovel, and wheelbarrows
- Larger sanctuaries may want to consider a front-end loader or tractor with a bucket for loading and turning.
- Many garden-sized tractors can be equipped with bucket loaders.
- A manure spreader can be used for mixing and turning materials as well as forming windrows or piles.
- A dump wagon or dump truck can also be used for dumping materials into piles or windrows.
- Specialized equipment, such as a windrow turner, is available for larger compost operations.
Monitoring Your Compost
When decomposition is complete, or nearly complete, the compost pile heats up very little, even after turning or aerating the pile. Finished compost should have a uniform, crumbly appearance, and an earthy smell. The more bedding material in the pile, the longer it will take for the composting process to work because of a high carbon to nitrogen ratio.
A quick and easy test to see if compost is “done” is to put a few inches of material in a small bag. Close the bag and set it in the sun for a few hours. Open it up. If there is a strong smell the material is not done.
So now you have the scoop on poop! If you have novel ways of managing compost at your sanctuary, please let us know. We hope our resources can grow to include new and novel ideas used by sanctuaries like yours.
SOURCES:
Manure Management For Small And Hobby Farms | Northwest Recycling Council (Non-Compassionate Source)
If a source includes the (Non-Compassionate Source) tag, it means that we do not endorse that particular source’s views about animals, even if some of their insights are valuable from a care perspective. See a more detailed explanation here.


