


There are multiple options when it comes to gentle restraint – different techniques will work better in different situations based on a variety of factors such as the purpose of restraint, resident health and preference, caregiverSomeone who provides daily care, specifically for animal residents at an animal sanctuary, shelter, or rescue. capability and preference, and how many humans are on hand to assist. In general, it’s a good idea to be comfortable using a few different restraint options. This way, you’ll be able to use the most appropriate option based on the circumstances.
Standing restraint is probably the most commonly used restraint method and will be our focus in this lesson. Folks may use some form of standing restraint while performing health checks, trimming hooves, administering medications, or when preparing to move a resident into a transport vehicle to take them to the vet. Oftentimes, standing restraint is also a necessary first step when using the other forms of restraint discussed later on in this course. Within the broader category of standing restraint are a few different techniques, which we’ll discuss more below. As with restraint options, more generally, the one that is going to be most appropriate in any given situation is going to depend on the specific circumstances and the reason behind needing to restrain them. For example, you may restrain an individual differently to administer oral medications than you would to trim their hooves.
Standing Restraint Without A Halter
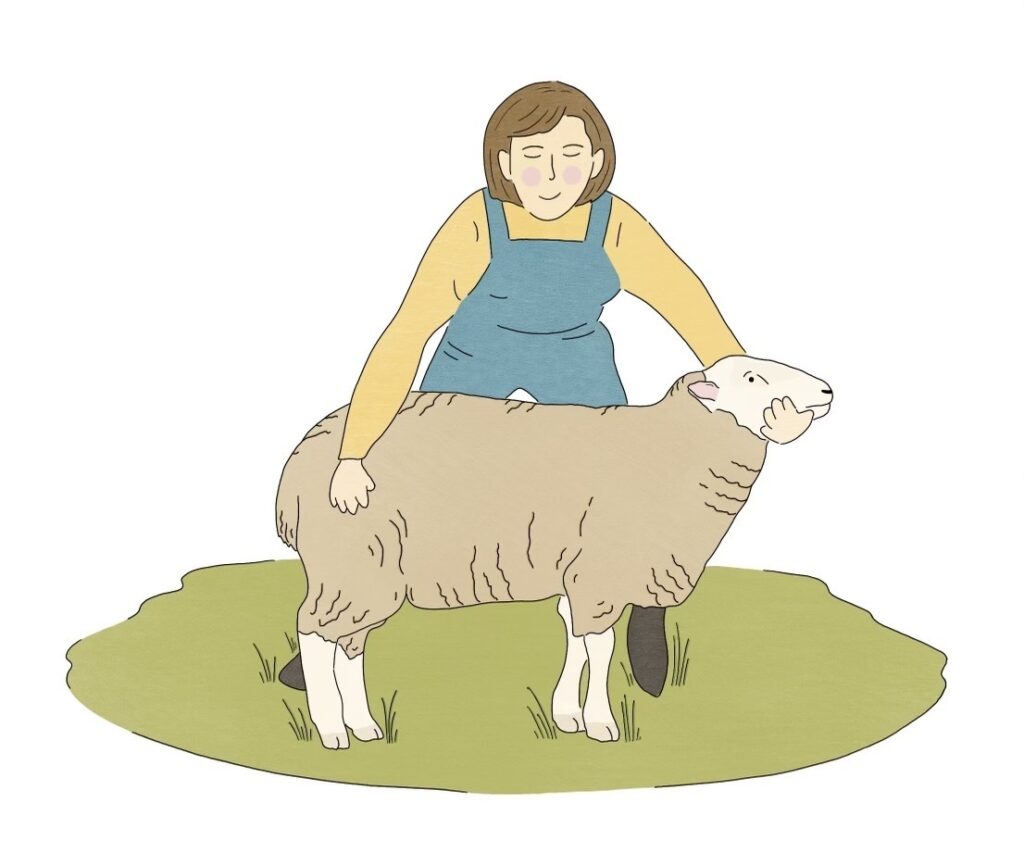
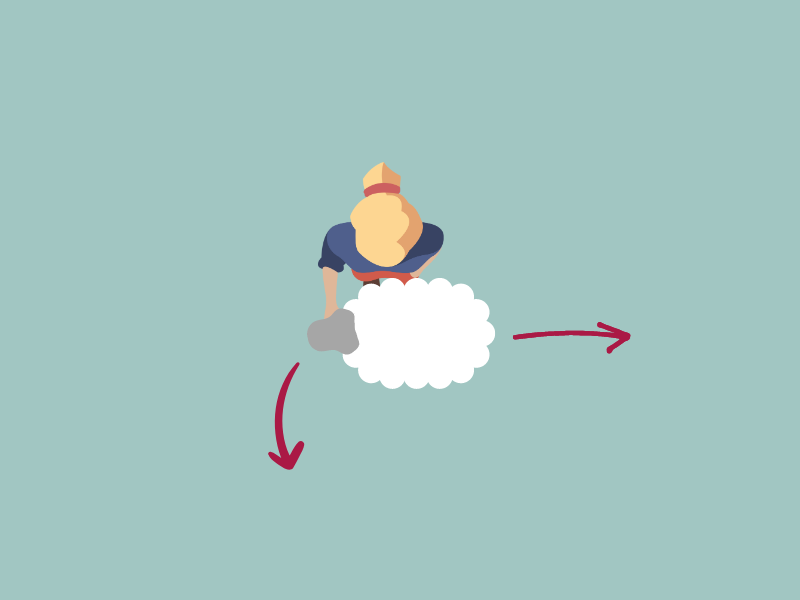
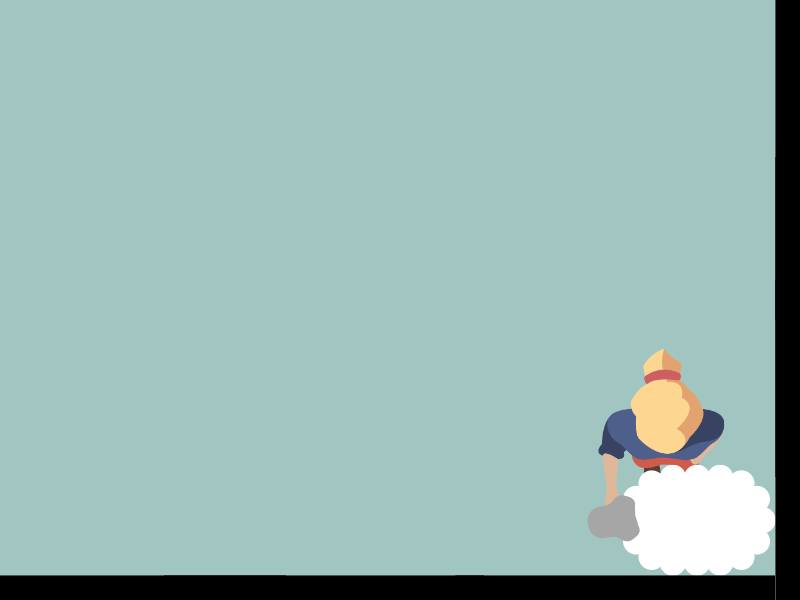
With this form of restraint, a caregiver uses their body (and possibly elements of the living spaceThe indoor or outdoor area where an animal resident lives, eats, and rests.) to keep a resident in place. To restrain a sheep or goat in this way, the caregiver places one hand under the individual’s jaw and holds their head parallel to the ground (or slightly higher) as shown above. If the individual is able to lower their head, they will have more power to move forward. If they are able to get their head too high, they may be able to squirm out of your grasp. To prevent the individual from moving backward, you can place your other hand on their rear end. While this may be sufficient to restrain some individuals, for others, you may have to take additional steps to prevent them from moving away from you. This is where physical barriers within the space come in handy. Without utilizing a barrier, the individual may be able to move away from you as depicted below.
If the individual is next to a sturdy barrier such as a wall, fence, or gate, you can firmly but gently use your legs to sandwich them against the barrier. For some individuals, placing one of your legs behind their shoulder may be enough to keep them in place (with your hand still under their chin). For others, you may need to adopt a wide squat, with one leg in front of their shoulder and the other near their back leg in order to prevent them from backing up.

If you are near a corner, it can be very helpful to back the individual up so that their rear is in the corner, which will prevent them from moving backward.
If the individual is not near a barrier and it is difficult to move them toward one, another option to consider is to carefully straddle them so that you have a leg behind each shoulder to help keep them in place (again, still keeping one hand under their chin). You want to make sure that you are not putting any weight on their back, instead gently but firmly squeezing them with your legs to keep them in place. Again, you mustn’t put any weight on their back, so this technique might not work for taller residents (and/or shorter humans).
While you can restrain both sheep and goats in this way, you may find that some of your goat residents are more difficult to restrain than your sheep residents (though everyone is an individual, so this might not be true at all for your residents!). If a horned goat resident resists the method described above, you can consider using their horns to hold them in place, but this must be done carefully and will depend on your Philosophy of Care. Some caregivers are strongly opposed to restraining an individual by the horns as a general practice, but it can still be helpful to understand the right and wrong way to do it in case a unique situation arises where this skill is necessary. You want to make sure you hold the base of the horns, never the tips! Attempting to retrain a resident by holding higher up on their horns could result in painful damage to the horns. Additionally, you only want to attempt this with true horns – never attempt to restrain a resident by holding their scurs (horn-like tissue that, unlike a true horn, is attached to the skin rather than the skull). To keep the resident in place by holding their horns, you will typically want to use both hands (one on each horn). As with the method described above, you could also sandwich them between your legs and a barrier or straddle them to keep them in place. Do not attempt to move a horned resident by pulling on their horns.
Using A Halter
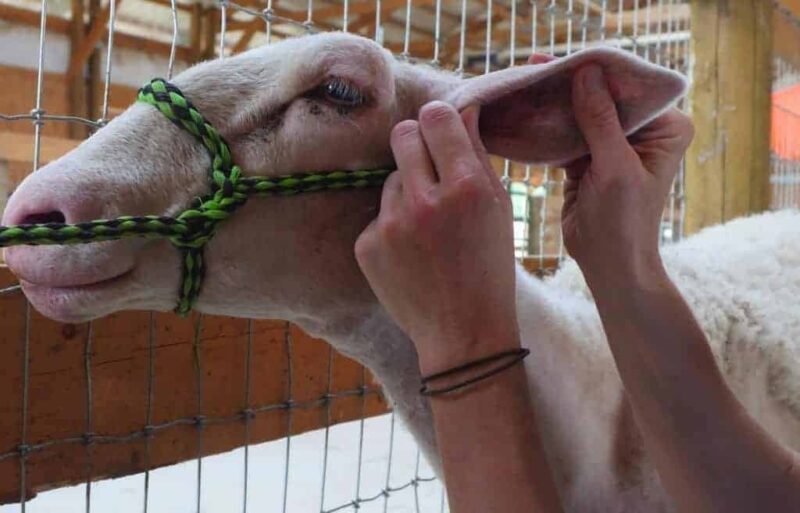
While the previous methods may work just fine for certain tasks, for others, it may be much easier to use a halter. This is particularly true if you do not have a helper and need to have your hands free for other tasks or if the individual needs to be restrained for more than just a brief moment. Therefore, we recommend having at least a few sheep and goat rope halters on hand. For safety reasons, residents should never wear any type of halter while unsupervised.
In order to most effectively utilize a rope halter, it’s important to know how to put it on a resident correctly. Let’s start by taking a look at the different parts of a rope halter and where they go on a resident.
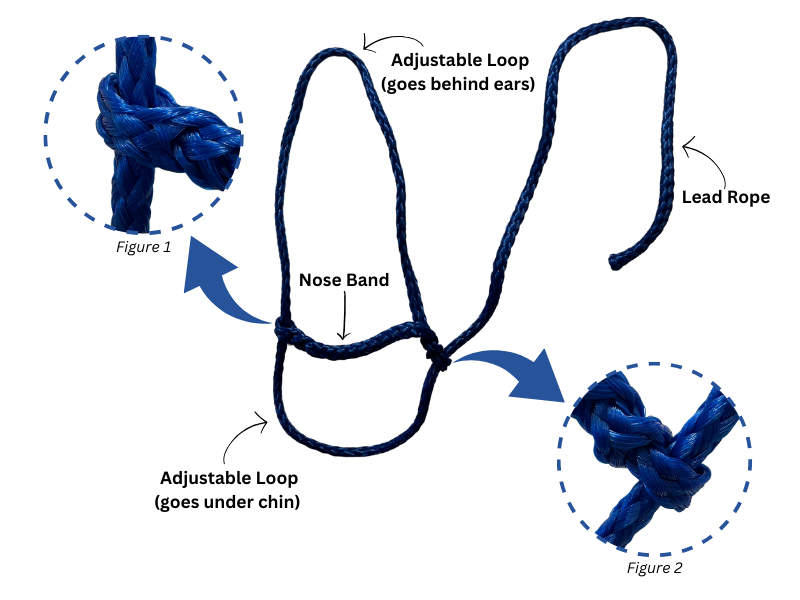
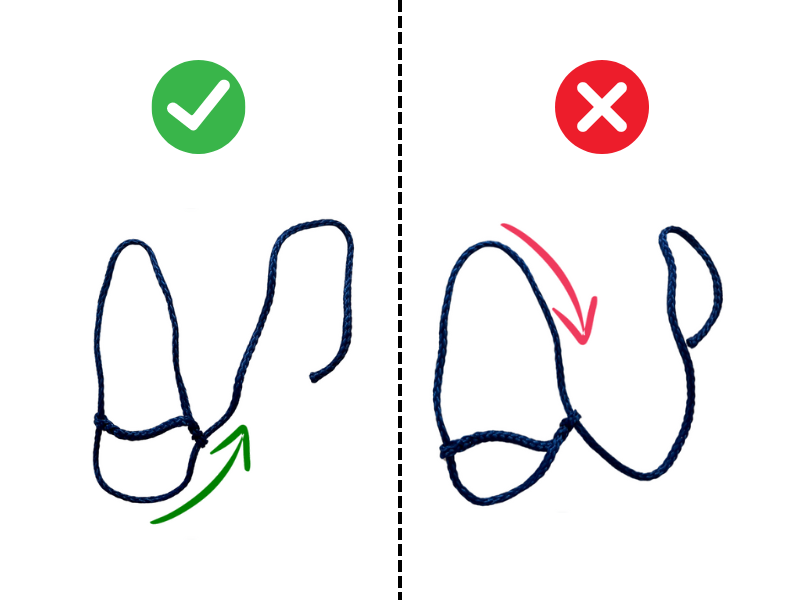
The most common mistake folks make when using a rope halter is to put it on upside down. Halters are often used to “show” animals, and in these settings, individuals are always led from their left side, so you’ll often see an emphasis on making sure the lead rope is on the individual’s left. However, ensuring the lead rope is on the individual’s left side does not ensure the halter is on correctly. Hollow braided rope halters, in particular, are very flexible and can be easily turned inside out. This makes it possible to have the halter on upside down while still having the lead rope on the left side. If it is preferable to have the lead rope on an individual’s right side, you can do this by turning the halter inside out, but ensuring the chin loop goes under the chin. Let’s look at the same halter as above and consider what happens when it is positioned right side up versus upside down.
Before attempting to put a halter on a resident, it’s important to take a moment to ensure you have it right side up. To double-check that you have the halter right side up, confirm that the small loop from Figure 2 is pointed down and that the loop directly connected to the lead rope is on the bottom. It’s also a good idea to adjust the two loops so they are close to the size you need to fit on the resident. Starting with a halter that has loops that are much too big or too small can make it difficult to get the halter on, especially for a resident who is not accustomed to being haltered or who actively struggles. Additionally, if the head loop is too big, it may slip down around the individual’s neck, which could prove dangerous if the individual struggles or manages to get away from you.
Now that you’ve got an idea of how to put a halter on a resident, let’s look at an example in the video below.
When placing a halter on a horned resident, it’s often easier to start by getting the head loop in place, expanding it just enough to fit over their horns. If you start with the chin loop, you may have to expand the head loop significantly in order to fit over their horns, which could be challenging while also trying to keep the individual in place. Once the halter is positioned properly, you can hold the individual in place by holding the lead rope, or you can use a quick-release knot to secure them to a sturdy, stationary element such as a fence post. (Tip – it’s best to tie off to a vertical element rather than a horizontal one, as this is more likely to keep them in place. Tying off on a horizontal element, especially a smooth one such as the bar of a gate, could make it possible for the individual to move forward and backward by sliding the lead rope along the horizontal bar). When working alone, having the ability to tie an individual off, even if you must use your legs to help hold them in place against a wall, can be very useful as it frees your hands up for other tasks (for example, FAMACHA scoring, health checks, or the administration of medications that require you to use both hands).
Be aware that if an individual seriously struggles while haltered, they could wind up in a dangerous situation. This is particularly true if they rear up in their hind legs, begin to flail, or if they drop down onto their knees. Any of these responses could result in a resident becoming tangled in their halter or being injured. It’s important to take time to work with these individuals to help them become more comfortable with the halter. In the meantime, when restraint is necessary, you’ll want to consider using a different form of restraint or making sure to have at least one helper on hand who can be in charge of restraint and monitoring their well-being while you perform the necessary health care task.
Whether you are holding the lead rope or tying it to a sturdy element, make sure you give the individual enough slack in the lead rope so that they can hold their head in a neutral position and move it slightly. If necessary, you can also use other elements of the space to help keep them in place, as described previously (i.e., you can use your body to sandwich them against a barrier or back them into a corner). Always pay close attention to an individual who is wearing a halter, watching that the halter stays in place (paying close attention to the nose band to make sure it does not slide up into the eyes or down over the nostrils). Never leave a resident unattended while tied off.
SOURCES:
Putting On A Halter | University Of Bristol
Sheep And Goat Medicine, Second Edition | D.G. Pugh And A.N. Baird (Non-Compassionate Source)
Handling | Maryland Small Ruminant Page (Non-Compassionate Source)
Sheep Behavior | Sheep 201 (Non-Compassionate Source)

