


This resource was updated in preparation for veterinary review. It was originally published on March 1, 2018.
A chicken’s nails, spurs, and beak are composed of keratin – the same protein that makes up our fingernails and toenails. And just like our nails, a chicken’s nails, spurs, and beak are always growing. As a result, trimming may be necessary to keep residents healthy and comfortable. We recommend assessing these areas at least at every health check and trimming them as needed. Below, we’ll discuss each area, looking at the factors that can affect how often they need to be trimmed, how to assess whether they are overgrown, and how to bring them back to a normal length.
Nails
How often a chicken resident needs their nails trimmed will depend on factors such as their genetics, how they bear weight, their general activity level, and environmental conditions. At first, it can be difficult to determine when nails need to be trimmed, but with time, you will become accustomed to what is normal and what is long. Like cats and dogs, chickens have a blood vessel and nerve that runs partway down the center of the nail. This is known as the “quick.” Nails should be slightly longer than the quick and should not curl or interfere with walking. To better see the quick, make sure the individual’s nails are clean. In chickens with light nails, the quick will look pink and more opaque than the rest of the nail. The quick can be much harder to see in chickens with dark nails, but holding a light behind the nail can help. Light will not pass through the quick as easily as it does through the rest of the nail, making it easier to visualize any overgrowth. Please note that the quick is often longer in nails that haven’t been trimmed in a while (we’ll talk about this more below).
Nails can be trimmed with the same style nail clippers typically used for dogs or cats, or you may opt to use a rotary tool such as a Dremel with an appropriate grinding attachment. One major benefit of using a rotary tool is that it avoids the crushing action of scissor- and plier-style clippers, reducing the risk of cracking the nail. If opting for these types of manual trimmers, you might want to soak their nails in warm water before trimming, as this will soften the nails and reduce the risk of them splitting when cut. While the goal is to trim nails without drawing blood, you should always have a blood-stop product, such as a styptic pencil or styptic powder (for example, Quick Stop), on hand just in case. Alternatively, cornstarch or flour can be used to encourage natural clotting.
If you’ve ever trimmed a dog or cat’s nails (or another bird species), you’ll find that the process is similar to that of a chicken. Use your less dominant hand to secure their foot/toe and your dominant hand to trim/file the nail. Go slow, taking just a little bit off at a time. Cutting into the quick is painful and bloody, so it’s important to be very mindful about how much you trim. As you trim, pay close attention to where the quick ends and observe the appearance of the remaining nail tip. If it starts to change color, this is an indication that you are getting close to the quick and should stop trimming. If nails have become seriously overgrown, you may note that the quick has also grown out, preventing you from trimming the nail back to a normal length without causing pain. In this case, trim as much as you can and then wait a few weeks for the quick to recede before trimming more. Repeat this process until their nails are back to a normal length.If you are using manual clippers, you may find that you need to file down the remaining rough edges with an emery board, nail file, or rotary tool to protect the individual from injuring themself when they scratch.
Video Resource: Safely Trimming A Chicken’s Nails
Spurs
Roosters (and some hens) have a bony growth on each leg called a spura stiff sharp spine (as on the wings or legs of a bird or insect). Without regular trimming, a rooster’s spurs can grow quite long and become very sharp. Very long spurs can affect an individual’s ability to walk and can get caught in elements of the living spaceThe indoor or outdoor area where an animal resident lives, eats, and rests. (such as fencing). Long spurs are also more likely to be broken, causing pain and bleeding. If the individual’s spurs curve significantly, they could even grow into the individual’s leg if left untrimmed. In addition to the issues unmanaged spurs can cause for the individual themselves, sharp spurs put others at risk, particularly any hens the rooster mounts. To keep hens safe, it’s imperative to keep your rooster residents’ spurs trimmed and blunted.
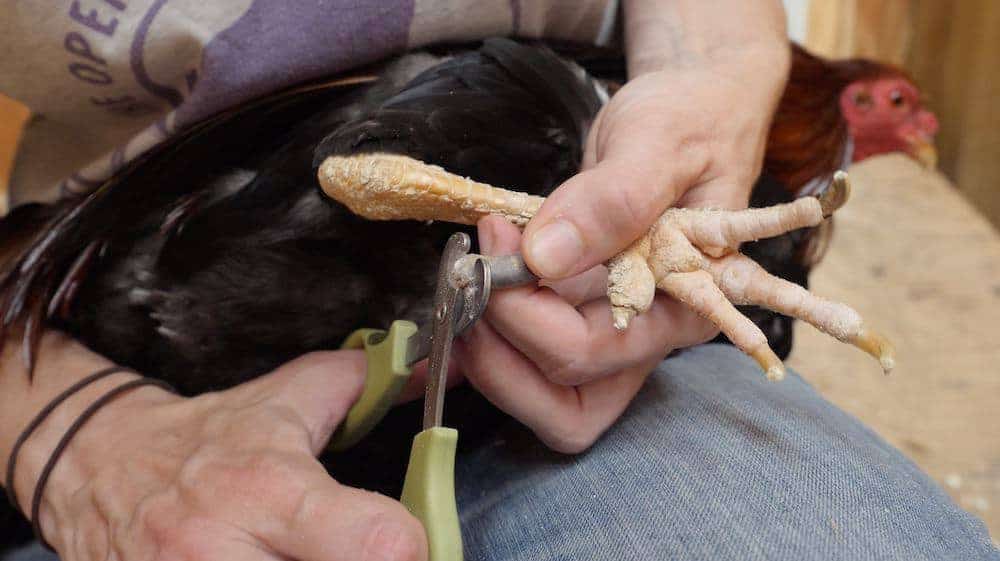
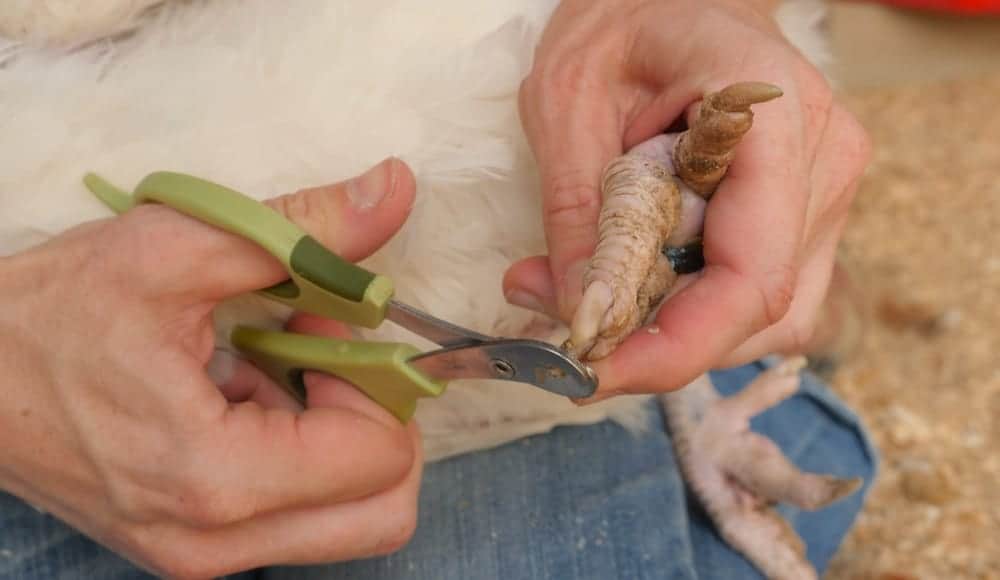
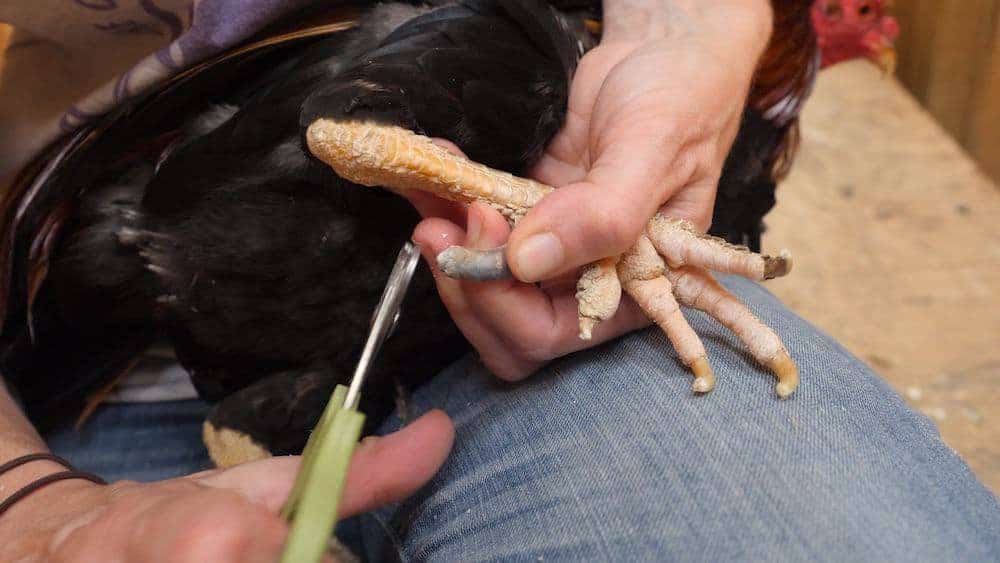
If you note that a rooster’s spurs look long or need to be dulled, you can do so with large dog nail clippers or a rotary tool (hens with spurs rarely need their spurs trimmed because they do not typically grow as long or as sharp as a rooster’s). Just as with their nails, a rotary tool is least likely to cause the spur sheath to crack. To avoid damage to the spur while trimming, it’s a good idea to stabilize the base of the spur as shown in the picture above.
When trimming spurs, keep in mind that just like when trimming their nails, you must take care not to trim them too short or you will hit sensitive tissue and draw blood. Hitting the osseous core will cause pain and bleeding. Unfortunately, compared to their nails, it’s much harder to visualize how much of the spur can be trimmed, though holding a light behind the spur can help. Because of this, it’s important to trim only a very small amount at a time. If you note a color change in the center of the trimmed area, this is a sign it’s time to stop. If you draw blood while trimming a spur, follow the same guidance described above for nail trimming.
If you plan to use dog nail covers on a rooster’s spurs, you can use the supplied adhesive to secure the nail cover to the tip of the trimmed spur (if the spur was trimmed so short you drew blood, wait for bleeding to stop and the area to dry out before applying a cover). For most non-bantam breeds, you will need the largest size offered (e.g., “XXXL” or “jumbo”). When you need to trim the spur again, simply trim off the tip of the nail cover and then remove the remaining portion before trimming as you normally would. You can then apply a new spur cover to the freshly blunted tip.
Please note that recommendations to intentionally remove the spur or spur sheath are unacceptable. If there is a medical reason to have a rooster’s spur removed, this should be done by a licensed veterinarian using proper anesthesia and analgesics.
Video Resource: Safely Trimming A Chicken’s Spurs
Beak
In a chicken with a properly aligned, full beak, it’s normal for the top beak to extend slightly past the bottom beak. However, if the top beak grows further past the end of the bottom beak, it could make it difficult for them to eat and preen, so you’ll want to carefully trim or file it back as needed. Many chickens will never need their beak trimmed, particularly if they have not been debeaked (a painful mutilation in which a portion of their beak is cut or seared off), as they will naturally wear it down during normal activities. However, if you observe that someone’s beak is overgrown, you will need to step in. In most cases, the top beak will be your focus, but some individuals may need their bottom beak trimmed, which we’ll talk about below.
The outermost layer of the beak is composed of keratin, and this protects the sensitive inner layers of the beak. When assessing the length of an individual’s beak, you should be able to visualize the inner layers, which will be opaque compared to the more translucent tip. If necessary, you can use a light to better visualize the structures of the beak, and sometimes looking at the inside of the beak is also helpful. When trimming, you do not want to get too close to the opaque inner structures. If the upper beak is just beginning to get too long, you can use a fingernail file or emery board to gently file it down a little bit. If it requires more than this, you can use large petAn animal who spends regular time with humans in their home and life for companionship or human pleasure. Typically a small subset of animal species are considered to be pets by the general public. nail clippers or a rotary tool on a low setting. Trim or file only a little bit at a time, and remember that it’s better to be conservative than to remove too much. If you are at all unsure about how much to trim, consult with your veterinarian or a chicken care expert for guidance. When trimming, make sure the individual’s head is secure so they cannot turn their head or move away from you, as this could result in damage to the beak. Beak trimming is much easier with a second person holding the individual so you can focus on trimming.
Be aware that individuals who have been debeaked may be more likely to need routine beak maintenance depending on how they were debeaked and how much of their beak was removed. If an individual’s top beak is much shorter than their bottom beak, you may find that the bottom beak needs to be trimmed every so often. Or, you may find that a chicken who has been debeaked has unusual growth, creating an abnormal beak shape that could interfere with eating or could be at risk of damage. These areas may need to be trimmed or filed to maintain a more normal beak shape. Always consult with your veterinarian if you are unsure how to proceed.
Residents who have a misaligned beak, which is often referred to as “crossed beak” or “scissor beak,” will likely need more help than other residents in keeping their beak maintained. These individuals may need their top and/or bottom beak trimmed. The goal here is not to correct the misalignment, but instead to keep the beak at a normal length. Again, we urge you to consult with your veterinarian if you are unsure how to properly care for a resident’s beak.
Video Resource: Safely Trimming A Chicken’s Beak
Proper nail, spur, and beak care play an important role in keeping residents healthy and comfortable. Be sure to keep an eye on these areas and address them as needed!
SOURCES:
Beak And Nail Care In Birds | VCA Animal Hospitals
Chicken Feet | University Of Illinois Urbana-Champaign (Non-Compassionate Source)
Care Of Beak, Nails, And Spurs In Backyard/Fancy Poultry | UC Davis (Non-Compassionate Source)


